
A few years ago I took the Wilton cake decorating courses from Michael’s. At the time I just wanted to learn how those folks on the cake challenges made their cakes, it actually isn’t that hard and I was pretty good at it. After taking the classes I periodically would make cakes for fun and practice, I even made a wedding cake for a friend of a colleague once. It wasn’t until last year though, that I decided to test my skills by entering my cake in an actual competition, and so I entered the Crawford County fair with my Bird Nest cake. To my surprise I won grand champion in both taste and decorating.
This year I decided I would try to hold on to my title by submitting something a little different. I have a little ornament of a teacup and sometime back in March, I was thinking, you know I probably could make this tea cup in cake. After toying with the idea and doing some online research I noticed there were a lot of people who made either teacup or coffee cup shaped cakes, so it wasn’t so uncommon, but I wanted mine to be different. Then I thought, wait a minute lets say I make a coffee cup cake instead, then I could make the cake taste like coffee. Despite the fact that I myself don’t like coffee and stay away from it as much as possible, I decided to aim for a coffee cup cake that tasted like coffee.
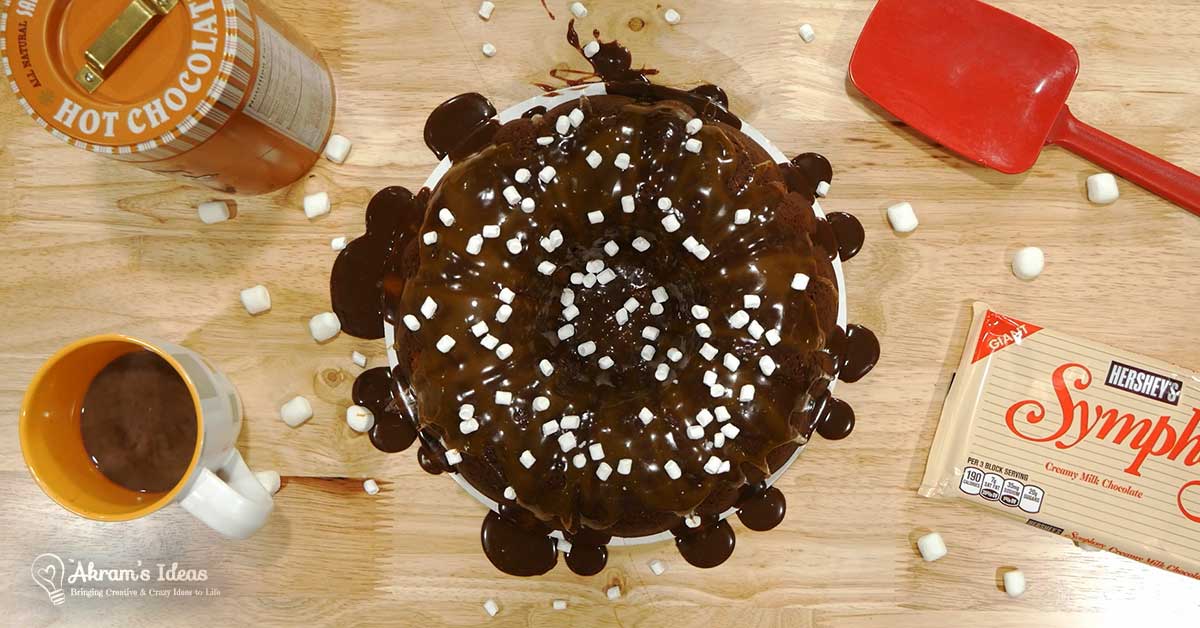
Before entering the cake came, I had to test the cake recipe, so I used the recipe from the Joy’s of Baking website for their German Chocolate cake, with a few minor adjustments. Originally the cake recipe called for 4oz. of Semi-Sweet chocolate, but I had a recipe for a hot chocolate cake that called for Hershey’s Symphony chocolate bar, and since they are sold in 6oz packages, I used them just breaking off the last row of the chocolate, in order to get the 4 oz. needed for this recipe. The cake recipe also called for coffee, and since I don’t drink the stuff I wanted to know which one to use. I got on the backing forums and it turns out the Starbucks VIA packets were the popular choice, with the Italian Roast flavor being a top favorite. So it was off to Starbucks to by the packets to be used in the cake. Again, since I don’t drink coffee, I needed some testers to tell me how the cake was, before entering it in the contest. So I decided to make one and take it up to work for everyone to try.

The idea for the coffee mug was to make it a PSU mug, PSU being Pittsburg State University; where I work. While making the mug, I thought I really should have something to go with it, and then I remembered that they sell those little doughnut shaped cake pans. Thus, I got one of those to make an accompanying doughnut to go with the coffee mug cake.
This first test cake would use one packet of Starbucks VIA in the mix and be completely covered in a coffee flavored chocolate ganache, then homemade marshmallow fondant. The handle for the mug was made out of rice crispy treats, and also covered in fondant. The doughnut was more or less a compliant to the main entry so I used the cake recipe that came with the doughnut pan. Needless to say this first attempt was far from a success. The ganache, never sat right, and because of it the fondant had a hard time sticking to the cake.
Because my original plan was to make a PSU mug for the cake, it had to be red, since that the main school color, but coloring the fondant to a bright red was not happening, instead it kin of turned a dark pink. The rice crispy handle turned out too bulky and boxy. The doughnut recipe wasn’t sweet at all and the doughnuts were just too small in scale to my 6″ diameter coffee mug cake. Lastly the testers said the cake was good, but the coffee flavor just wasn’t there.
My next attempt at the cake was to enhance the coffee flavor. This time I used two packets of the Starbucks VIA in the cake mix. Next I needed to have the fondant stick better to the cake, so I went with a traditional fudge buttercream frosting. To be lazy I just used the Pillsbury fudge frosting, but then I mixed it with 1/2 cup of powdered sugar to stiffen it up some, and I also added one packet the Starbucks coffee, to add more of that coffee flavor. The handle, I decided to make out of fondant and I also tried harder to cover the cake using a single sheet of fondant, but didn’t quit make it. I also decided since I couldn’t get the red the color I wanted, I would just used white, for a more crisp coffee mug look. However, for this test cake I decided just to practice with the left over pinky red fondant I made for the first test cake.
Next the doughnut this time was just a box yellow cake, backed in the same 6 in pan as the coffee cake layers. To create the doughnut shape I used a small tea glass to cut out the hold and then a knife to cut the top and bottom edges around the cake in order to make it look like a doughnut. I was lazy and didn’t really reheat my fondant enough, so this 2nd cake had really wonky looking fondant covering, but hey it’s really the cake taste I was testing this time around.
As for the mug handle the fondant was too heavy to pin to the mug and looked worse than the rice crispy handle, so I figured I’d try using Gum Paste to make the handle for the final cake. Also I just covered the doughnut with some chocolate ganache, but because the cake had been trimmed, it looked crumbly, so at this point I knew the final doughnut would also have to be covered with fondant to look the way I wanted. I did have just enough left over white fondant I decided to play around with the idea of making a napkin to along with the cakes, this worked out pretty good. Despite these flaws the new the coffee taste was well reviewed by the testers.

Next it was time to make the final cake. The fair was on Wednesday, so I baked on Monday. I start all my cake projects by setting out the ingredients and getting them to room temperature, while the oven preheated. Then the first part was to cream the butter, sugar, eggs and vanilla, before mixing in the melted chocolate.

Next I shifted in the flour, baking powder, baking soda, and coco, taking in turn to pour the mixture of butter milk and coffee. Until the entire mixture was reading for baking. Since I made the cake Monday, this meant the cakes, covered in plastic wrapped, got to fully cool in the fridge over night. Tuesday I carved out my cake pieces by trimming the cake tops to level them out. I save the cake tops to use as cake pops later.

I also carved out the doughnut the same as the 2nd test version, first by leveling the top, then carving out the edges to give it more a beveled look. Finally a tea glass is used to create the doughnut hole.

Like the second test, I covered my coffee mug in the fudge/coffee buttercream frosting, first with a crumb coat (thin layer of frosting to catch the crumbs) then after a quick chill the main layer of frosting is applied. The cake batter makes three 6 in cakes, which I layered more of the fudge/coffee buttercream between. Since this time I knew I was going to have to wrap the doughnut in fondant, I needed to also cover it in buttercream. For the doughnut, though, I used a basic buttercream recipe and added 3 table spoons of Great Value sugar free Strawberry Jam to it for both flavoring and to give it a nice pink color. The frosted cakes chilled in the fridge over night.

The morning of the fair, I got up early to prepare the fondant. I use homemade fondant recipe which is a mix of melted marshmallows, powered sugar and a few tablespoons of water/vanilla extract. After mixing the beating the mixture with the bread hook in my Kitchen Aid, until a dough like consistency, I roll out the fondant to prep for the cake. The top of the mug, I used the cake pan to cut out a circle to place on the top. Next using a template of the cake, I made with parchment paper I was able to roll out a single sheet of fondant to wrap around the coffee mug cake. Because I wanted to make a lip for the mug, I rolled out a thin rope of fondant to place on the top edge. The night before I had molded a handle out of gum paste, placing two toothpicks so that the handle could be pinned to the mug. The gum paste was supposed to dry before attaching to the cake. Unfortunately my handle cracked so I was forced to make another that morning, but luckily the new handle not only dried in time, it was even better. Using some of the white fondant I made a napkin by rolling out a rectangle, then folding it over, off-center. I created the napkin looking edges using a toothpick impressed in the fondant.

To make the doughnut, I tinted some of the fondant using a mix of copper, brown and golden-yellow food coloring. I think the color came up a little light, but it worked. After covering the entire doughnut, I made some pink fondant to look like doughnut frosting. Finally I covered in sprinkles.

The last step was making the coffee to pour into the coffee mug cake. I used my standard chocolate ganache recipe and then added one packet of Starbucks VIA coffee to it. Using a spoon I scooped it into the mug ridge I created on the cake. Lastly to give the mug some personality, my husband suggested I make a heart. So, I used a food coloring pen to draw and color in a heart on the front of the mug.

In case you want to try out the coffee flavored cake here’s the recipe.

- 4 ounces Hershey's Symphony chocolate bar
- 2 1/4 cups white flour
- 3/4 cup Hershey's unsweetened cocoa powder
- 1 1/2 teaspoons baking powder
- 1/2 teaspoon baking soda
- 1 cup lukewarm coffee made with 2 packets of Starbucks VIA Italian Roast
- 1 cup buttermilk
- 1 1/4 cups butter, room temperature
- 2 1/4 cups granulated white sugar
- 5 large eggs, room temperature
- 1 1/2 teaspoons pure vanilla extract
- Preheat oven to 350 degrees F and spray your pans with cooking spray. I used three 6 inch round pans.
- In a microwave safe bowl melt your chocolate. Heat in small bursts until chocolate is melted.
- In a separate bowl, sift the flour, cocoa powder, baking powder, and baking soda.
- In a small bowl, combine the coffee and buttermilk.
- In a separate bowl beat the butter until smooth and creamy. Add the sugar and continue beating until the mixture is fluffy (this will take about three to five minutes). Scrape down the sides of the bowl as needed. Add the eggs, one at a time, mixing well after each addition. Add the vanilla extract and beat to combine. Then add the melted chocolate and beat until incorporated.
- Add the coffee/buttermilk mixture and flour mixtures in three additions, beginning and ending with the flour mixture. Beat only until the ingredients are mixed together.
- Divide the batter evenly among the prepared pans and smooth the tops. Bake for about 35-45 minutes or until a toothpick inserted in the center comes out clean and the tops spring back when lightly pressed. Remove from oven and place on a wire rack to cool for about 15 minutes.

Four hours after dropping off the cake I returned to discover that I had once again won Champion of the contest. All in all I’m really happy with how the cake turned out and I want to thank all my co-workers who helped test the cake out for me.


I am DYING over this cake! I actually had to look twice to see that it was a cake at first – you are an amazing artist!
Thanks Megan!
In person you could really see the seems of the fondant, but it photographed excellently. I’m happy with it anyways.